TL;DR
The long-awaited StyleRow POs are live! 🎉 Try them out by following the directions written below or in the video tutorial linked here and let us know what you think at product@stylerow.com.
What are StyleRow Purchase Orders?
After this April 17, 2023 release, you can export all the documents relevant to the design process in one platform. Our purchase order PDFs are elegant, refined, and beautifully branded with your design company information and logo and stored in both the brand new Vendor View tab, as well as the Budget. Check out how to create them below, or follow along in a more detailed tutorial here.
Step 1: Prep your items for export
Details you may want to fill out or edit on the Vendor View are:
| Item name Vendor-facing description Vendor Contact Name* Vendor Contact Phone* Vendor Contact Email* Dimensions | COM SKU Sidemark Tax paid to vendor Deposit % Other customizations on cost calculations |
*Note that any updates made to a Vendor’s contact info will be updated for all items with that Vendor. If you’d like to enter a Vendor with multiple contacts, we suggest you create a new entry for the Vendor with the new contact. (e.g. Hellman-Chang – West; Hellman-Chang – East)”

Step 2: Start the PO
Once your items are filled out and prepped, navigate to the “Export” dropdown at the top right of the Project or Budget. Select “Create PO.”
Then, select the Vendor you would like to create the PO for. You may add an Account Number if applicable for the Vendor–this Account Number will save for the Vendor after the first export.
Hit “Continue” to go on to the next step.

Step 3: Select the items that you want to order
On this step, select the items you want to include on the PO. This list should be filtered to only the items associated with the Vendor you chose in the previous step. However, if you’d like to see the full list of items in the Project, you can select “All Items” at the top right of the list.
Once you’re done selecting items, hit “Continue.”

Step 4: Fill out Vendor & Ship To Address Info
Fill out the Vendor Address and Ship To Address, if relevant. These are not required for PO creation, but highly recommended. Like the Account Number, the Vendor Address will be remembered for a particular Vendor after the first PO. You can still edit it by PO if you wish.
Both the Project and Receiver Address options for Ship To Address can be filled out in the Project’s Settings > Address Info page. Like Vendor Address, you will still be able to edit the Project or Receiver Address by PO.
Once you are ready to move on, hit “Create PO.”

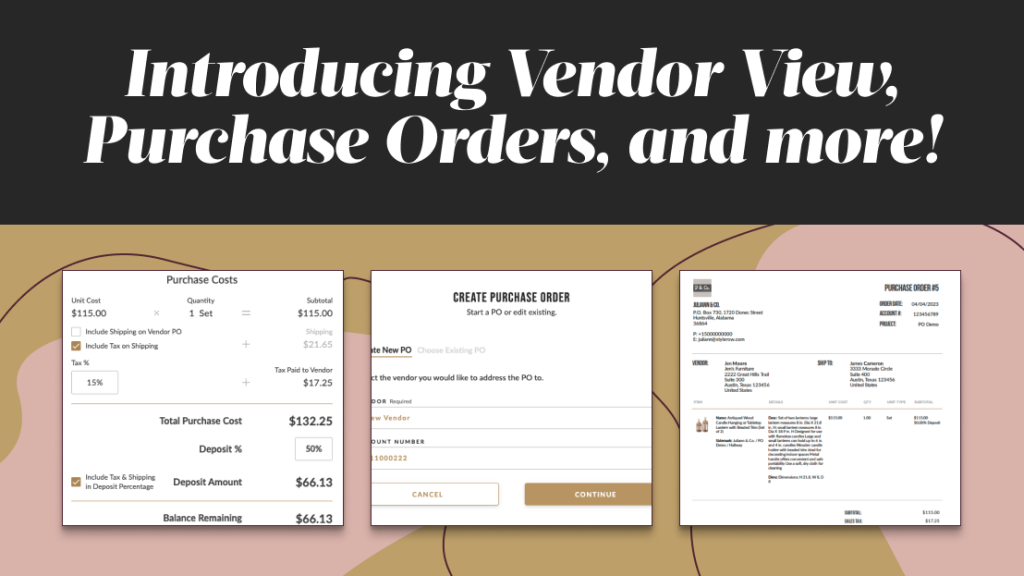
Sample PO Export
Here’s an example of what a finished PO in StyleRow looks like:

Happy designing!
Book a demo now to learn more.
The StyleRow Product Team